Tuesday, 21 July 2015

BIG BANG NORTH WEST 2015


Just a quick report on our adventures at the Big Bang Aintree.

Early one drizzly summer morning we set out for Aintree racecourse with a car packed full of exciting science equipment and a huge box of dry ice!
We were in the Irish Bar which was also where everyone arrived to register and after setting up we had a look round the hall at the other exhibitors in our space and a quick cup of coffee. Then it was time!!!

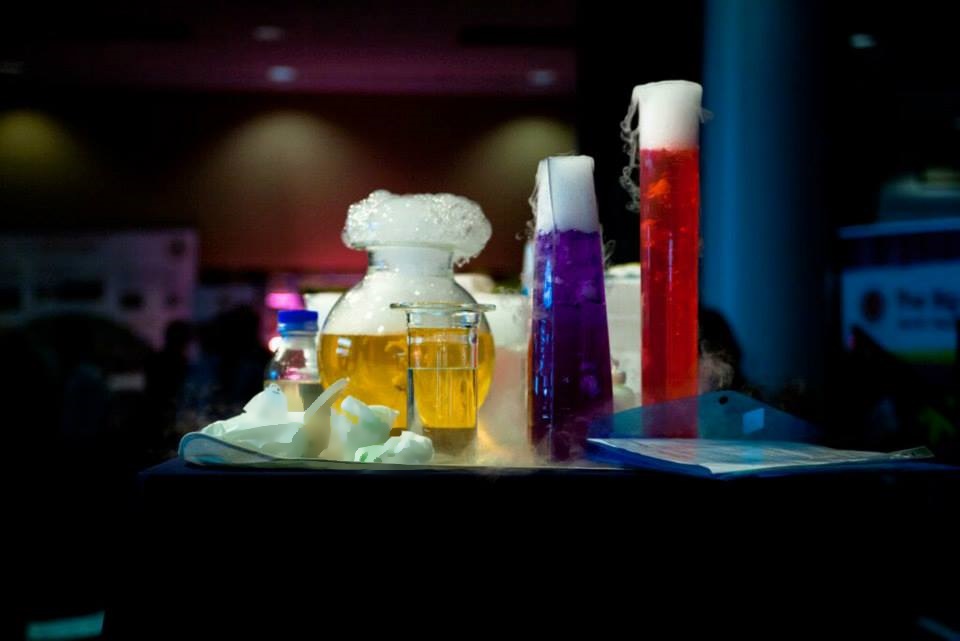
We opened with the pink and blue bottle, moved swiftly into rainbow test tubes and then we were into our stride. Over the next 20 minutes we shared smart materials such as heat sensitive paper, our hydrochromic shower curtain, the
hydrogel balls ( of course) and far too soon it was time for the finale….vast amounts of dry ice!

We repeated the show in the morning and then raced to get all our gear off the stage for the next act. We were also to finish up the afternoon with one slightly longer show before the awards ceremony.

The hall was bustling full for most of the day but as the end got nearer our audience grew and grew and suddenly we were presenting to a packed hall with everyone really enjoying
themselves and joining in.

An unusual photograph from our point of view gives you a feel for what it was like. Pop over to our website for a gallery of images

Wednesday, 1 July 2015

SUMMER SCIENCE SNIPPETS 4


HOME MADE ICE CREAM
without a freezer using science!

As I am writing this we are experiencing the hottest weather so far this year. So what better way to cool down than with some ice cream

Everyone loves a cool ice cream in summer - the sound of the ice cream van is evocative of long summer days.


Making home made ice cream can be as easy or as complex as you want it to be.
There are many custard based recipes where you have to do proper cooking before you even get to freeze your mix.


There are super scientists all over the place making it with liquid nitrogen ( huge fun but don't try it at home!)

this is me many years ago at Catalyst Science Discovery Centre Widnes


There are home ice cream machines - some that do the whole thing can be quite pricey - others where you freeze the bowl overnight and the machine basically churns the mix are cheaper.


However there is another  method which uses a little bit of science knowledge to drop the temperature and freeze the mix.


This is a favourite of American teachers! I made this when I was teaching in Tennessee and it really does work.


There are lots of posts on the internet with recipes and instructions so here are a few links. Find one you like and have a go.
http://www.sciencemuseum.org.uk/~/media//Educators/Educators_downloads/icecream_in_bag.ashx

http://www.ljmu.chemistryforall.co.uk/making-ice-cream/

http://www.instructables.com/id/How-to-Make-Homemade-Ice-Cream-in-a-Bag/

One tip from someone who has had icecream all over the place and mixed in with the salt....use a double bag! All that manipulation of a very cold plastic bag can cause it to split.

If you are going to eat the ice cream - and why  not we ask -  you need to remember food hygiene rules and make sure everything you use is clean and hands are washed.

Have fun!!


Thursday, 25 June 2015

SUMMER SCIENCE SNIPPETS 3

SANDCASTLES

There is something very British about a bucket and spade holiday.

Memories of sandwiches with real sand crunching between your teeth, struggling to get out of that wet swimming costume in one of those home made  towelling tent things - come on I am not the only one who had one surely!!


As a child we often went to Swanage on the Dorset coast and sometimes travelled along to Weymouth where the large sandy beach is a mecca for makers of amazing sandcastles which they create at the start of the season and paint so they last all summer.


Of course most dads thought they could do just as well....mine used to create cars for us to sit in and also huge holes which I seemed to be forever trying to get out of.

My two girls loved making sandcastles with their dad - and as we holidayed in Wales it was easy to see the real thing to model from.
I think we even bought a castle shaped mould - which is cheating really.


Amazingly there is a whole community of sandcastle artists and a huge amount of research goes into what actually makes the perfect model - what sort of sand, how much water, what height and so on.

So here is a little of that knowledge for you to see if it improves your building.

Of course you don't need a beach - a sandpit will work too

You can find a very scientific article here:
http://www.nature.com/srep/2012/120802/srep00549/full/srep00549.html

Here is a great extract about how to create sandcastles from
Sandcastles Made Simple by Lucinda Wierenga, published by Stewart, Tabori & Chang

The list of ingredients for creating a simple sandcastle is short: sand, water and a few digging and carving tools. But that is only the start.......
Sand - The first and most important thing you need to know about sand is that you can't do a thing with it unless it's wet. When you add water to grains of sand, the liquid forms "bridges" that connect the granules to one another. This is why damp sand sticks together, so you can shape and carve it.
Packing down or "tamping" wet sand drains more water more quickly, creating even shorter bridges and an even more solid clump. Sand that has been compacted in this way can be subjected to extreme carving.
Water 
1 Use lots of water. Dry sand in its natural state is lazy stuff. It wants to lie down and spread out into all sorts of nooks and crannies. The good news is that as long as you keep gravity working for you, there is really no way to add too much water. Which brings us to our second rule.
2 Let it drain. If you've ever tried to make the base of a sandcastle by filling a plastic bucket with wet sand and then trying to unmould it, you've seen how important this rule is. With no place for the excess water to drain off, the sand makes a sucking, sticking, vacuum seal with the plastic and it becomes difficult, if not impossible, to remove the bucket.
This is why successful sand sculptors do not use plastic buckets or other closed moulds but build their shapes by stacking handfuls of wet sand or by tamping it down in a topless and bottomless form.
Compact the wet sand to form structures. "Pounding sand into submission" is an intuitive and time-honoured method of strengthening and tightening those bridges that hold the grains together. You can use your hands or feet, or even a tamper, to compact wet sand.
3. The building methods
Soft-packing
Soft-packing is how the majority of the uninitiated approach sand.
 Mound up a big pile of sand and stabilise the pile. Using the long handle of your shovel, poke a lot of deep holes into the pile then pour buckets of water into the holes. Stomp on the pile until it feels very solid beneath you. If necessary, go back and poke more holes and add more water.
Pack and shape. Working from the tallest element in your composition, pack the shape with your hands until it feels stable. Take handfuls of moist sand, push them into place and roughly shape them.
Carve and smooth. Using your smoothing tool, smooth and define the elements of your composition. Moisten as necessary. The longer you work on your composition, the more your sand sculpture will dry out – you must keep it moist.You need to keep pushing and smoothing.
Hand-stacking
When you're tired of crawling around a soft-packed sculpture on your hands and knees, you will be ready to try hand-stacking. It takes practice but once you master the mix-scoop-plop-flatten-jiggle move, you'll be building the best castles on the beach. The method is just a modified dribble technique using larger handfuls of sand – very large, very wet handfuls.
Hand-stacking involves scooping out handfuls of wet sand and helping them settle into each other in order to form structures. It's the only building technique in which you mix the sand and water in advance. With soft-packing, you start moulding with dry sand and then add water.
The most difficult aspect of hand-stacking is that it's less intuitive than soft-packing; many people have an instinctual urge to pound the sand into submission. Hand-stacking is a great way to involve the whole family in a sand-sculpture project, with duties evenly divided between "stackers" and "carvers".
Mix Scoop Plop Jiggle
You will soon find that big, fat things are easier to carve then little, skinny things, so build big. To do this, you need big handfuls of sand. You do not need big hands to get big handfuls if you scoop properly.
With one smooth, swift motion (so that you don't lose too much water), plop the double handful of sand on to your base. There may be a bit of "pouring", but a common error to avoid is the "slam dunk". The taller and more delicate your structure is, the more gently you should plop. If you are building a tower, keep your hands on top of the sand; if you are building a wall, your hands will go directly to the sides.
Jiggle. Very gently, jiggle the new pile of sand. The common urge is to force this to happen by pounding, packing and pummelling the sand into compliance. Resist. Instead of using brute force, jiggle or vibrate the sand, helping it to settle evenly on to the layer beneath. Wet sand wants to flow downwards, and as long as you keep it moving, it will continue to settle in on itself, becoming denser and filling in spaces.
Almost as important as understanding how to jiggle is knowing when to stop. When the sand has stopped flowing, further jiggling will form cracks in your structure. Don't jiggle sand that has already settled into place.

There is so much more info on the internet so do some research and find out the fascinating science of sandcastles and maybe you will be building amazing structures like this.....


Monday, 8 June 2015

Summer Science Snippets 1

A little bit of science fun over the summer months........

We all know the benefits of wearing sunscreen but how often do we either forget or think it isn't really very sunny so don't bother?
How many struggle with young children who for some reason hate being rubbed all over with a cream....I wonder why??


At the moment one well known company is using a UV camera to show how their product blocks UV rays....it looks impressive.


Here is a simple and really fun way to test out your suncream.

These little beads are UV reactive and now you can buy them all over the place.


We have been using them for a few years to demonstrate modern reactive materials along with hydrochromic and thermochromic products.

simple bracelets of UV reactive beads
By exposing the beads to UV you can change their colour from a plain creamy white to a range of brights.

Here we have made simple stretchy bracelets and put part in a clear plastic bag which we then smeared with suncream. The other part we left out in the sunlight.
We used two different SPF strengths - it really does make a difference what strength you use!
See for yourself.........


Wednesday, 3 June 2015

Brand New Workshop for KS1


We know that KS1 teachers love having us in to do shows and workshops but with the new 2014 science curriculum so many of the things we get up to have moved to KS2 so we decided to make sure the younger scientists didn't miss out by creating a workshop especially for KS1 to complement the show All About You.

Usually when we go to a school with our shows we have the whole school in a number of age appropriate groups but then if there is any time left we will work with class sized groups in workshops. Often this is KS2 so we have added a special workshop for KS1 to our programme.

Our show All About You is such good fun and full of amazing facts about our incredible bodies. When we are working with the younger ones we focus on things that really matter to them such as what can I have in my lunchbag if we are a Healthy Eating school? 


Timmy our 3rd member of the team comes along to helps the volunteers make a lunch bag full of healthy goodies that are good to eat. We have sourced some amazingly realistic prop food so we we pack up our insulated bag for lunch so that we can have some tasty snacks that keep us healthy.
We explore our super senses with feely tubs and grot bags....as you can guess the older ones love going for the grot bags and putting their hands into disgusting goo or slimy snot!!


We take our huge mouth and have a good explore of how to clean our teeth and what all those nashers actually do. Then we actually get a couple of volunteers out to make home made toothpaste and test it against shop bought.


We use our blue cuddly cold virus to talk about keeping healthy and safe from colds and to show how easy it is for colds and other nasties to spread we give a whole class a cold. Helen has the most amazing glittery snot you have ever seen!!


For KS2 we offer tasty toothpaste or bath bombs as a class workshop  and we have decided to extend part of the show about senses and make it into a full workshop for KS1. We have been busy sewing feely bags ( little bags which you put you hand into and try to decide what is inside just by feeling). Helen has sourced strange objects to put inside....nothing too scary but things which feel amazing. 

We have some lovely shakers as sound makers and have an ingenious way to let everybody test their sense of smell with some strange odours!!

Everyone who has tried this new workshop has really enjoyed it so now it has a full place on our programme alongside All About You our show about being healthy. Teachers can now choose to have a workshop with KS1 about Super Senses, with lower KS2 making toothpaste or upper KS2  making bath bombs.

Thursday, 12 March 2015

British Science Week

bsw2015Here it is!
British Science Week is probably the busiest time of the year for science presenters.
This is when some lucky schools decide to have a whole week off timetable to devote to science....some create assemblies and each class shares some science every day........some schools buy in special speakers - like us!

The week is organised by the British Science Association (BA) and this year with a new name and dedicated website it looks to be bigger than ever.

The BA produces lost of materials  publicity goodies and activity booklets to helps schools and communities put on events.
Some years there is a theme, other years is it more general.

This year we have created a new show to go with one of the new activity packs which isi all about colour.
So our new show is called KALEIDOSCOPE and explores the science of colour, how we see, optical illusions, colour blindness, colour chemisty and colour in physics.
We use colour chemistry to WOW the audience including finding out how our eyes work and why some animals can see lots of colours and others - like dogs - can only see a few.

As part of the "imagine a world in greyscale" theme I have been busy making food.....
I used a polymer clay in black and white which I mixed to get a good grey using what looks like a pasta machine....which it is but only used for clay work...thank goodness!

Then I used an extruder to make strands of "spaghetti" and made some textured balls.
Once on the plate I baked it in the over for about 20 mins to set the clay.
What do you think?? Fancy it for tea? I love making props for our shows


We will be sharing some of our favourite colour chemistry demonstrations including the amazing EXPERIMENT where four volunteers and Helen turn clear liquids bright pink and then clear again - it seems to be magic but it is certainly science!
look carefully and you can see the pink liquid turning clear as it enters Helen's vessel

We will be using some of our gadgets and gizmos from the light show such as the plasma ball and lighting up fluorescent tubes

and of course we will be using our wonderful rainbow glasses so that everyone can catch a glimpse of the visible spectrum.


We are taking part in a day of science fun at Ness Gardens Cheshire on Saturday 14th March so we will be trying out a mini version of the new show back to back throughout the day. It's free so why not come along and see us!
capture-20150302-100249


Sunday, 8 March 2015

A Warm Welcome in Wallasey


We have been to a brand new school both for us as visitors and for the school itself.
Well perhaps brand new isn't quite correct.
Somerville Primary school in Wallasey is coming to the end of a major refurbishment which has given them super new teaching spaces but probably the most impressive is their amazing hall.
The space can be split into two and has dining facilities so this is where the pupils have their lunch but also there is the facility to make it a community resource. The hall has totally separate entrance and lobby so that the local community can use it without having to open the whole school.
We were able to park in the designated area in front of the hall and easily unload to get all our equipment in - quite impressive and very useful!
Once inside there were designated toilets - again brilliant because we didn't have to go wandering off around the school to find water and once inside the actual hall we were blown away by a wonderful rainbow effect that the large windows have - there are beautifully coloured panes of glass among the plain.  The effect is one of lightness and airiness with pale wood used throughout.
Parts of the school are still being worked on so some children will be in mobile classrooms for a while yet but once finished it will be incredible.
A new school without closing the old one, being able to carry on while all the work is being done and keeping their footprint....a very important point.

Anyway after being very impressed with our warm welcome - from the Head teacher no less - we were helped by a very friendly caretaker who had organised the fire alarms so that we could set fire to things without worry.

We quickly set up and  ready for a 9 o'clock start with years 1 &2 thinking about Materials and what things are made from and how important it is to get the correct materials for the job. Timmy gave us a hand sorting out whether things were natural or man made

Then it was the turn of year 3&4 and we were thinking about solids liquids and gases using flashes and bangs and flame and ice to get over our ideas.
So that everyone could have lunch we pushed our tables against the wall and covered them over and went off in search of the very youngest scientists!
Somerville is a large school with a 3 form entry so we met 3 different reception classes for some hands on sessions having a good play with some of our most exciting gadgets and gizmos. We changed the colour of paper and plastic straws just by warming them with our hands! We made gloopy liquids much runnier by warming them up, we lit up little ducks by giving them a little hug ( you really had to be there to see how lovely that was) and then we all had a go with the rainbow glasses even the teachers and helpers, which was lots of fun.
After a quick lunch and a much needed sit down it was time for the oldest pupils years 5 & 6 to experience All Change - exploring changing materials by freezing with lots of dry ice, by warming and burning and again Helen got a wow with her flaming custard powder.

Finally we mixed all sorts of weird and wonderful materials and got some very surprising results.

We packed away most of our equipment and then took  big box of goodies to the staff room for a drop in session where teachers could have a go themselves with some of the show demonstrations.
We still had some dry ice left so we pretended we were Harry Potter - huge fun. We set off a few handwarmers and used the heat sensitive paper and straws to see what happened. We had a good play with our incredible disappearing hydrogel balls - and we left a box behind for them all to have a play with and then we all had a go at Art on a Plate - milk, colours and washing up liquid.

Thank you to Mrs Connelly for organising the day - and for being so efficient - this was a school visit that ran flawlessly - mainly due to the school being so organised and helpful. I do hope we can visit there again!!